
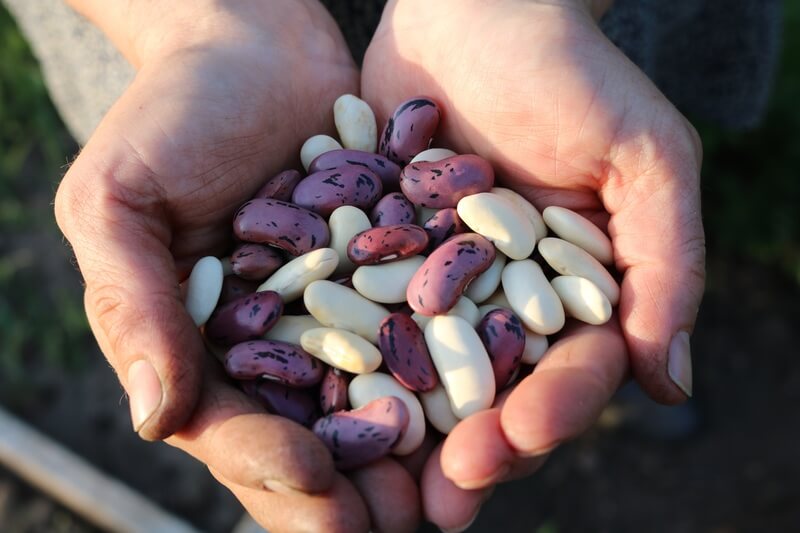
Common beans are botanically known as Phaseolus vulgaris and originate from America. It is an annual crop that is herbaceous from the Fabaceae family. Bean is grown as a green vegetable as well as a pulse. It can be vine-like, bushy, or climbing kind as per variety. The bean leaves are usually purple, and green with three oval leaflets, and grow on the stem.
Bean has different varieties like dry beans, field beans, pole beans, haricot beans, french beans, kidney beans, and more. In this article, we are going to tackle a piece of detailed information about beans. To get more knowledge, keep reading this article to the end.
What are the Best Times to Plant Beans?
The best time to plant your beans is after spring, any time once the spring frost date ends. Within this period, you can sow your beans outdoors. It’s important to consider the soil temperature; ensure the soils are about 9 degrees Celsius or 48 degrees Fahrenheit warmed. The optimum beans planting soil temperatures lie between 15 and 29 degrees Celsius.
Sowing beans too early isn’t recommendable as the seeds might fail to germinate. They may even rot or delay germinating due to cold, and the soil is moist.
However, if the soil is moist enough to enhance seed germination, then you can head start sowing by applying black pea sticks over your entire garden bed. It will assist in soil warming before planting. In this situation, you can also place a landscaping fabric for warmth.
When it comes to green beans, there is no advantage of commencing the seeds early indoors. These kinds of beans are fast growers, and their fragile roots make it difficult to survive transplanting.
If you want to plant your bean seeds late and have them successful, you are supposed to wait for about 75 days. These days are until the first frost threat is done. Also, it’s ideal to select the bean varieties that have a short maturity period such as green beans. Any time you want to do late bean planting keep in mind the following tips. Firstly, note its days to maturity of whichever variety you have. Secondly, keep in mind the declining sunlight amount every moment you move to fall. Having those two things on your fingertips will enable successful late sowing. With green beans, you are guaranteed a dependable harvest when sown in mid-summer as the season is warmer. In mid-summer, the decline in sunlight leads to shorter days thus, depending on bean seed varieties, you are supposed to add ten days after the actual maturity date.
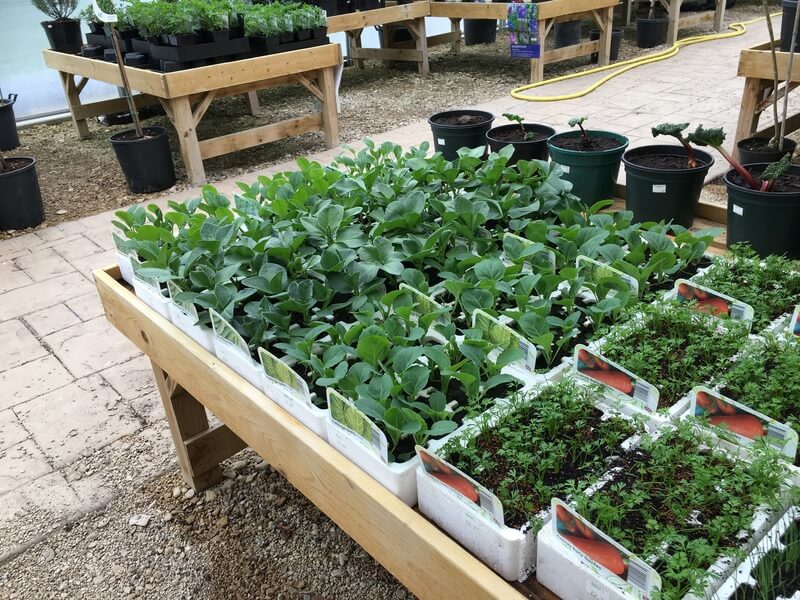
In case you want to use transplanting, then commence indoor bean seeds sowing earlier. Do this before average frost 3 to 4 weeks to attain the head season start. To avoid root disturbances while transplanting, you can use a biodegradable paper pot for the indoor process. Successful transplant occurs when done two weeks after the last frost.
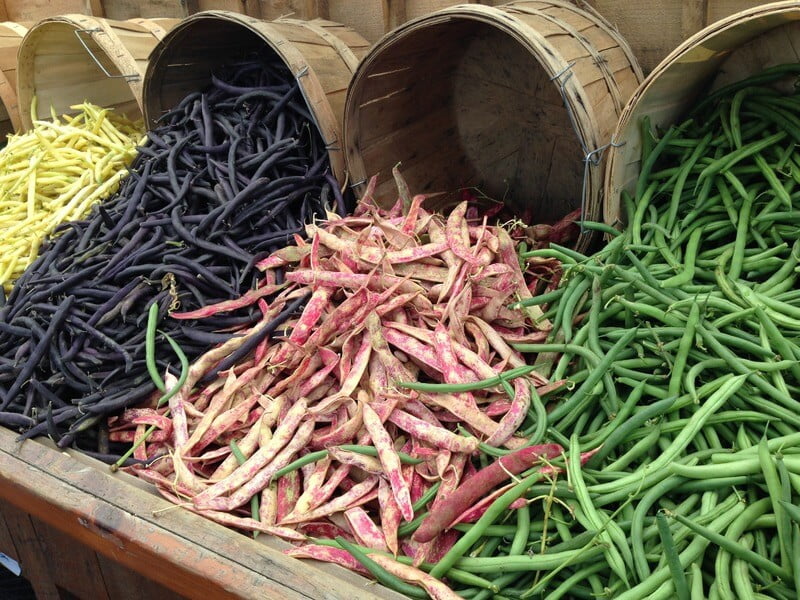
Types of Beans
Beans fall under two categories: indeterminant, beans with a vining habit that requires support, also known as the pole beans. The second category is the determinant-type growth- they grow as a low bush.
Green snap beans are the common ones, that is, ones that are most familiar to people. These green beans have an edible pod and are known as ‘string’ beans. However, today’s varieties have been bred in a way that they do not have a tough, stringy fiber along their pod’s seam thus making them easy to ‘snap’. Some green beans are not green, but purple and when cooked, that’s when they become green.
Butter or lima beans are grown for their immature seeds. These beans are rounded and flat and with a very unique flavor. They are the most sensitive variety or rather type of beans. Horticultural beans, also known as “shelly beans” are large-seeded beans with fiber-lined pods that are very tough. The seeds are shelled while still soft. The beans are harvested when fully formed but are not dried out.
How to Increase Beans Yields
All beans prefer a sunny spot and should be planted in well-drained soils that are boosted with well-rotted or compost manure the autumn before sowing. A great technique to boost the growth of your beans is to create a compost trench. It should be 30 cm deep and this is where your beans will grow. Fill the trench with kitchen scraps then top with leaves and cap the trench with soil. By spring, your garden will be incredibly rich and moisture-retentive. In this way, your bean will thrive.
What is the Best Way to Plant Beans?
The best ways to plant beans depend on the bean varieties – bush bean, pole beans, and more. For bush bean seeds, sow them in rows of about 18 to 24 inches apart; ensure the depth is one inch and keep it two inches apart. If your soil is sandy, it’s recommendable to sow them a little deeper, but don’t go too deep.
In the case of pole bean seeds, you are supposed to set up supports such as trellises, stakes, or other kinds before sowing to avoid disturbing the plants’ fragile roots. Always ensure you plant this type of bean seeds at least one inch deep with a distance of about three inches apart. For the pole beans, you can also use a cattle panel, which is a part of a wire fence that is highly portable, for easy support. This kind of bean support is usually 5 feet tall and 16 feet long. It makes it easier for the beans to climb, thus making your harvesting quicker by removing contorted positions.
When planting pole beans on small hills, you need to sow about 5 to 6 seeds with a spacing of 40 inches apart.
One of the best ways to plant your bean seeds is by creating a tepee. Using a bamboo pole that is seven-foot-long, tie together about three or more of them. At the top of the tepee, ensure the branches are straight and perfectly make the legs splay in a circle. From there, make sure you plant three to four bean seeds, do this around each pole. For the process of making tepee to be easier, you can train the vines to wind up their poles as they appear. To increase stability, you are supposed to wrap a wire halfway up around the poles encircling your tepee. This is the best way of enhancing the vines.
Beans Diseases
Different diseases attack beans; some are fungal, bacterial, and more. Some of these diseases include;
Anthracnose (Glomerella lindemuthiana)
Anthracnose bean disease is a fungus kind. It has several symptoms such as; reddish-brown pod spots that later sunken, having rusty margins. Another symptom include a small lesion on the beans’ cotyledons that are dark brown to black. The lesions on the plant stem are eye or oval-shaped, which later turns brown and sunken having a margin that is purple to red. This disease weakens the stem by the cankers, drying, and shrinking pods.
In most cases, this kind of disease is highly transmitted through failure to crop rotation as the fungus has a high potential to survive in the soil within the crop debris. To manage this disease, you are supposed to plant certified varieties and avoid watering through sprinklers.
Bean rust
Bean rust disease is fungal and botanically known as Uromyces appendiculatus. The symptoms of this bean disease commence with a yellow or white small spot initially on the plant leaves. The spots enlarge with time showing raised uredinia or rather rust pustules that are more brick red. In normal situations, the formed pustules have a yellow halo surrounding margins. When this disease is more severe, your bean crops will experience premature leaf drop.
The worst part of this bean fungal disease is that urediniospores from one field are spread to another by air. At the end of the bean crop season, some black teliospores are formed over winter, ending up as next season crops inoculum.
Therefore, to overcome bean rust disease, you are supposed to grow highly resistant varieties. It is also crucial to ensure all infected crop debris is removed and destroyed. Always keep your field weed-free, practice crop rotation, and in extreme cases apply the appropriate fungicide.
Bacterial blight (Xanthomonas campestris)
Bacterial blight bean disease is caused by bacterium as the name suggests. It has several symptoms such as; water-soaked leaves spots which later enlarge to form necrotic. The yellow zone discoloration surrounding the spots, coalescing lesions giving the crop a burned look; pod lesions that are red-brown, sunken, and circular; dead leaves remain on the plant; oozing pod lesions especially on humid conditions.
This kind of bean disease is spread or introduced into the newly planted bean seeds through contaminated seed; warm temperature favors its emergence; bacteria in the crop debris overwinter. When it comes to spreading its greatest during wet, humid weather conditions.
For bacterial blight management, you are supposed to plant crop-resistant varieties, using only certified seeds. To kill the bacteria, always treat your seeds with the correct antibiotic before sowing. It is also recommended to spray copper-based fungicides for symptom protection.
Halo blight (Pseudomonas savastanoi pv. phaseolicola)
Some of the symptoms of halo blight bean bacterial disease are as follows: small spots on the leaves’ underside that are usually water-soaked and turn necrotic with time becoming visible on the crop leaf’s upper surfaces. The chlorotic tissues surrounding the spot may develop lesions. In cases of expanding leaves, lesions lead to distortion, visible red-brown pods lesions, oozing, or color turning for the pod lesions.
This bacterium can survive for a long time in plant debris and seeds. Later, it gets into the plants via stomata or other natural openings. You are supposed to be keen while watering your crops because water movement and splashing enhance the spread.
When it comes to the management of halo blight, make sure to sow disease-free seeds, practice crop rotation after every two years with non-host variety and ensure all crop debris is buried after harvest. In case you lack disease-free seeds, use an appropriate antibiotic to treat the seeds.
Damping-off (Rhizoctonia solani, Pythium sp.)
This kind of bean disease is caused by pathogens such as oomycetes, fungi. It has some visible symptoms such as stem and roots having reddish-brown lesions that are sunken and elongated. This can appear below or at the soil level. Plant death occurs when the lesion girdles on the stem, reducing the yield on the older plants with little disease indication. Also, the pith of the crop turns brick-red.
The pathogens responsible for the disease are highly transmitted by the soil, equipment, and irrigation water. However, management is possible, all you need is to practice non-host crop rotation, proper depth seed sowing in warm soil, and appropriate fungicide seed treatment.
Which are the Major Insect Pests for Beans?
- Aphids
Aphids are small-sized and soft-bodied insects found on the leaves underside and the plant stems. This kind of bean insect pest has varying colors depending on the host plant and the insect species. They can be pink, black, red, but in most cases, yellow or green.
Heavy aphid infestation leads to yellowing of leaves or distortion, leaves necrotic spots, sooty mold growth resulting from aphids’ honeydew secretion, stunted shoots, and more.
Aphids’ attacks leave your crop leaves with tubular structures. For limited aphid infestation, you can control the spread by pruning the few affected leaves. You can also use available tolerant varieties. Ensure your plants are aphids-free before transplanting. Use silver-colored plastic reflective mulches to prevent the insects from feeding on the crops. In case of high aphid infestation, you can apply insecticides to treat them.
- Corn earworm (Helicoverpa zea)
It’s an insect pest that highly damages buds, leaves, pods, flowers, and beans. When young, they are cream-white with a black head and hair. The older larvae are usually yellow-green, sometimes almost black, with white lines running along the body. The base of their hair has black spots. Corn earthworms lay their eggs on either the upper or lower surfaces of the leaves. The eggs are creamy-white initially, then a brown-red ring develops, and lastly darkens before they hatch.
For organically sown plants, you can apply Bacillus thuringiensis chemical to control the insect infestation. To apply the chemical treatment for a commercial plantation, you are supposed to keenly monitor the crops – for young larvae and eggs.
- Cutworms
Cutworms mainly affect seedlings or young transplants at the soil line. In case of late cutworm infestation, the pods will have irregular holes. This insect is usually active at night, especially the damage-causing larvae, and hides in the plant base soil during the day.
They have a wide range of hosts thus, you need to ensure the field is clean and the seeds are disease-free. Make sure all crop residue is removed from the soil two weeks before sowing. It is recommended to follow the right crop rotation.
Harvest
When the maturity of your beans is attained, you are supposed to harvest them to avoid losses when they over dry. Therefore, whichever type you have sown harvest them when at their highest sugar levels. In that case, do it in the morning.
Green Beans Harvesting
Green beans are usually picked when they are young and tender. This time is ideal as the inside bean seeds haven’t developed fully. Therefore, pick the beans each day because more beans will grow the more times you pick for the green kind. To harvest, it’s important to usually look for beans that are firm, sizable, or with pencil thickness that can be snapped. Cut off the desirable beans without tearing the plant. Fresh ones will be easier as they snap without any difficulties. Any green bean with bulging seeds inside will taste tough as they have passed their peak.
Caring for beans
Your young plants, or rather seedlings need a little encouragement to latch on the support, but in a short span, they will find their way up. The bush types do not need much support, though, for top-heavy plants with beans, they will need twigs, short canes, and pea sticks for support.
Your beans should be well-watered in the dry weather, mostly when they begin flowering. Mulching around the base of your plants helps to preserve moisture and gives weeds a tough time. Any weeds that grow should be removed by hand without disturbing the plant’s roots. Pinch out the top of your pole beans when they have reached the top of the support to prevent them from attaining unnecessary mass and concentrate their effort into producing flowers and beans.
Conclusion
The common beans are available in huge varieties, thus when sowing always pick your desired kind. It is very important to monitor your field as well as the transplants or seeds before planting. This way you will be in a good position to manage the spread of pests and diseases. Always ensure you use certified seeds and remove any crop remains at least 2 to 3 weeks before planting.
References
https://www.almanac.com/plant/beans
https://agrilifeextension.tamu.edu/library/gardening/green-beans/
https://ourstoneyacres.com/late-planting-of-beans
https://harvesttotable.com/how_to_grow_green_or_snap_bean/
https://cropwatch.unl.edu/plantdisease/drybean
https://plantvillage.psu.edu/topics/bean/infos/diseases_and_pests_description_uses_propagation
Discaimer: _ The information contained in this website is for general information purposes only. The website focuses on connecting job seekers with potential employers and provides relevant job search resources. _ Please note that if you find any job closed, we will update that job as soon as possible. or Find current job openings Here.
0 Comments